NOTICE: You are viewing the old archives of
Musatcha.com.
|
|
|
|
|
|
|
|
| You are using the latest version of the Musatcha.com Advanced WiFi Mapping Engine | |
| You have the latest version of MySQL installed and ready to go |
The wifi mapper uses ODBC to connect to it's data source. To connect to a MySQL DB, you need the MySQL ODBC Connector. It can be downloaded here:
http://dev.mysql.com/downloads/connector/odbc/3.51.html
Get the newest version possible. I think at a minimum you need 3.51.10, as older versions of 3.51 won't work with the latest version of MySQL due to a protocol change.
The schema for importing into MySQL can be found in the folder in which you installed the program. However if for some reason you deleted it in your last rampage of frustration in lack one free cluster on your hard drive, here's an extra copy:
If anybody would like to convert the syntax over to other DB engines, e-mail them do me and I'll post them here.
Import that file into a clean database in MySQL using the method of your choice. (Yes, I know this is a cop out, I'll finish this part of the tutorial later.)
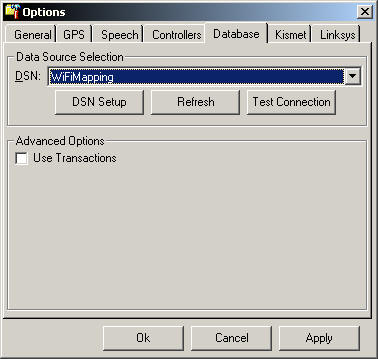
A DSN (Data Source Name) is required to describe the ODBC connection settings. Open up the wifi mapper, click options, edit preferences, and click on the database tab at the top. You should have something that looks a bit like this:
Click on the DSN Setup button. This will launch the ODBC data source setup.

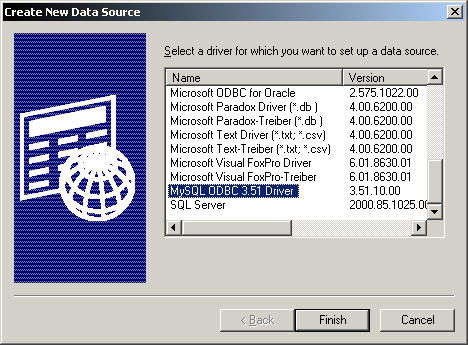
If you want this data source to be accessible from any user on your system, click on the System DSN tab. Otherwise click on User DSN tab. In either case, click the add button. Scroll down into the list of drivers and find the MySQL driver as shown below:
Click finish. Fill in all the appropriate boxes. The Data Source Name can be just about anything. Same with description. The server is the address of your MySQL server. It's probably localhost if it's on your machine. The username and password fields should be self explanatory. For Database, pull down the drop down list and choose the name of the database that you decided to use. When you get done, you should have something like this:
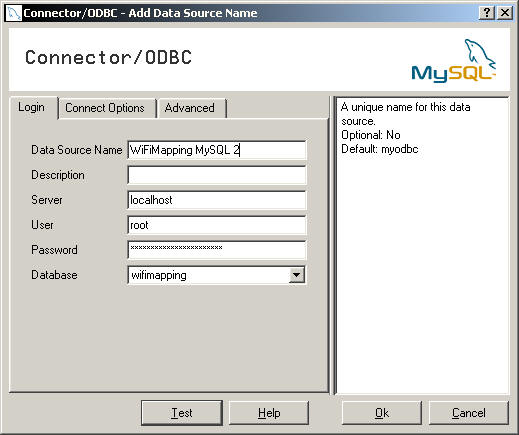
Click Test to test the connection. It should say something along the lines of "woot, it worked". (I paraphrased that slightly.) If everything is cool, then hit OK. If not, go back and see what you did wrong. :-) On the main ODBC setup window, just click ok.
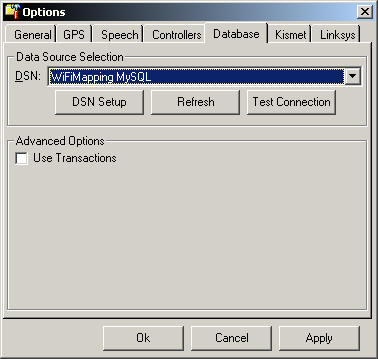
You should be back to the wifi mapper options panel by now. Pull down the DSN drop down and find the DSN you just created. Next be sure to uncheck 'Use Transactions'. MySQL doesn't support or need transactions for optimization.
Hit Ok, and restart the WiFi Mapping Engine. You should be good to go.
Depending on your OS, particularly win9x, these screens may look entirely different to you, but the concept is the same.
If you have all kinds of problems, make sure you have version 2.8 of the MDAC components.
Musatcha is pronounced moo-SA-cha. I have no
idea where it originated.
|
